Sunday, December 11, 2016

Carprog Full V8.21 Online read write Golf VI IMMO data & change KM

This is a detailed tutorial for how Carprog Full V8.21 Online read write IMMO data and change mileage for a Golf VI 2011. Follow below steps and pictures things done!

Carprog 8.21 online read& write Golf VI 2011 Immo data in 3 steps

Step1. Open Carprog V8.21 software then choose “DASHBOARD”→ “VW” → “GOLF 2009 ONLINE DIAG V0.2”.
Click “Read Immo” and wait its connecting.


Create a txt file on desktop named “Immo-Data-for-Golf- VI” as below:


When Carprog read out the Immo data, copy the VIN, PIN, CS and MAC to txt file “ori-cluster-2011” section.


Step2. Go to main menu and choose “TRANSPONDER” → “VAG NEC KEY V0.1”.

Choose “VW (TP23)”, click the third button at top then click “Write”.


Click “OK” to start write then write OK.

Click the first button at top to open folder “VW-Golf- VI-2011”, choose “Immo-Data-for-Golf- VI-2011-carprog-read” then click “Open”.


Click “Write” then write OK.

Write key to Immo file: Choose “Key 3” then click “OK”. Choose “Immo-Data-for-Golf- VI-2011-carprog-read” file and change the file name as “Immo-Data-for-Golf- VI-2011-carprog-read-with-key-3”. Click “Save”.


Step3. Back to “DASHBOARD”→ “VW” → “GOLF 2009 ONLINE DIAG V0.2”.

Click “Open”

Open “Immo-Data-for-Golf- VI-2011-carprog-read-with-key-3”


Click “Write Immo”, click “OK” then wait it OK.


Carprog V8.21 change Golf VI 2011 mileage just 1 step!

Click “Change KM” and it will show the old value both in KM and ML. Choose “ML” option and enter a new value then click “Change”. In this way, Carprog V8.21 change mileage for Golf VI 2011 easily!


Tuesday, November 22, 2016

How to do when you lift pin 55 on Carprog

Now I have succeeded in one Carprog unit(CARPROG FULL V9.31), with help of a sewing needle. It will go wrong because I get up two pin, and then I can not solder back the faulty pin.
Now I have managed to get another one ready for easy flash with J-Link adapter.
But I will make another one to experiment with, and rebuild to full function or better.

Below is some useful tips from forum bros. Wish this helps

*** autocargo says:
… find scrap electronics board and practice on that. I use thin syringe needle and magnifying glass.. No point practicing on your working CarProg….
Use thin solder tip or hot air off course…forgot to say… but I don’t think you would be doing it without applying heat…

*** demelec says:
needle under leg needed lifting and heat with hot air, then very carefully lift only a little just so it separates from pcb solder

Soldering iron you have to use very thin tip and just touch very end of leg to remove ( solder at very end so not actually touching leg) then you can lift with needle
And always use solder flux
Flux is the main key to easy working

Thursday, November 17, 2016

Carprog 8.21 clone doing Skoda Yeti 2012 with nec&24c64

Have done odometer correction on Skoda Yeti 2012 with nec & 24c64  by Carprog v8.21 online version clone.
Connect Carprog with adapter and connect to vehicle

Open Carprog 8.21 software
Select DASHBOARD
Select Skoda
Select Skoda 2009-> DIAG v0.2

Select Change KM


Connecting CAN…
Reading mileage please wait

Carprog read KM 58117

Change KM to miles

Enter value you need, click on Change

Follow system prompt.
Done!

Monday, October 10, 2016

How to fix Carprog Clone LIB File Problem

Here is the working solution on Carprog clone “LIB file problem” by re-flashing Mcu ARM AT91SAM7S256 step by step.ECU Programmer

OBD Tech
Problem:
Any work solution for carprog v8.21 clone?
“Lib file problem. delete LIB file and make Update>-Internet”


Solution:
Yes, reprogram ARM with any jtag programmer.

Reflash Carprog MCU ARM by Jtag:
We need the stuff:
1- AT91SAM7S256.bin
2- Jtag programmer
3- Jtag software
We need to prepare the Carprog to connect to Jtag programmer but first the flash need to be erased, the Jtag function in mcu is disabled, you can’t connect to the mcu before erase the flash. Remove the AT88SC eeprom from the board, please note where is the pin 1 in eeprom before remove:


Carefully lift the pin 55 (reset) of the mcu and solder a wire and secure it with a small amount of silicone (you don’t want to broke the pin in the process).
Connect the Carprog (with the pin 55 disconnected) to the 12v supply, wait about 10 seconds and connect the wire from pin 55 to Vcc (3.3V) in Carprog:


Wait from 5 to 10 seconds after connect the 12v supply, the flash content will be erased and the Jtag option of the Mcu will be enabled now. If not work leave connected for about 3 to 5 minutes. Disconnect the 12v supply from CarProg full  and remove the pin 55 wire from vcc. The pin 55 must remain disconnected until the programming process is done.
Ok, that’s it. I make it; and you try on you risk.
Article from:http://carprog-carprog.blogspot.com/2016/10/how-to-fix-carprog-clone-lib-file.html

Saturday, October 1, 2016

CarProg with A9 A1 A1+ adapters test operation

Which adapter is necessary to make a test when the Carprog full fails to work? And how to do the test? Go on reading the post to get answers yourself.

A9 first!!!

If CarProg hardware test fail – in most cases you just need exchange 4x 74HC125 integrated circuit. Exchange all 4 74HC125 together!!!


update your Carprog A1 adapter:
carprog-a1-adapter
open A1 solder additional tantalum or electrolytic capasitors – this MOD will solve “communication lost” problems.
– A1 before modification:


– A1 after modification:


or with electrolytic capasitors 47uF 25V
carprog-47uf-25v-electrolytic-capacitors

update your A1+ adapter: 
open A1+ solder additional tantalum or electrolytic capacitors – more stable OBDII communication.  Also very important for older CarProg users – change one 1k Ohm resistor and solder 120R Ohm

– A1+Before modification:


– A1+ after modification:

or with electrolytic capacitors

TRY AT YOUR OWN RISK.

Thursday, September 15, 2016

Carprog full program Nissan SRS with C1 OBDII female adapter

It’s all about CarProg v9.66 software for Nissan 2015+ airbag sensors with Infineon XC2336B internal data flash read/write by OBDII.

Carprog full kit

C1 OBDII adapter

Nissan ECU and C1 adapter wiring diagram

If "crash data" is stored (errors B142x - collision detection is stored in DTC memory) - data flash reading is not possible !!!

This function is recommended to use for backup data flash from working airbag sensor.


NOTE!

Carprog software is included in CARPROG AIRBAG FULL or CARPROG FULL Perfect packages.

Caprog v9.66 is customer share and uobdii engineers need more test with it and release soon.

CarProg full v9.31 and v8.21 are verified to reset nissan airbag well.
Article from: OBD2 Blog Site: http://blog.uobdii.com/carprog-full-program-nissan-srs-with-c1-obdii-female-adapter/


Friday, August 19, 2016

Newest Version V9.31 Carprog FULL FAQs and Feedback

Here are Carprog FULL V9.31 FAQs and user feedbacks as a collection for you reference. Hope it helps.

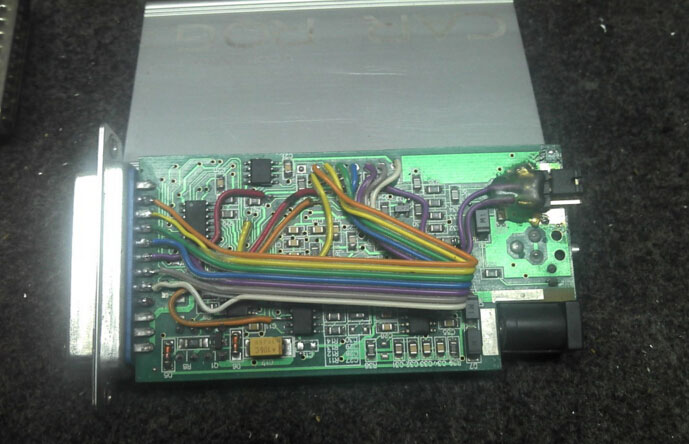
Brief Introduction about Carprog
Carprog with all 21 items Adapters is a tool designed specifically to come to your rescue when you need to know the code of a car radio, a board or an immobilizer but not all. With Carprog you can make appointments for keys, change odometer, airbag reset but also others.
 carprog-carprog-full-new-1
Frequently Asked Questions when buying Carprog FULL V9.31
Q: Is Carprog V9.31 the latest version Carprog Full? How can you send it to Russian?
A: Yes, Carprog V9.31 is 2014- latest Carprog diagnostic tool, and we can send it to via EMS or HK post.

Q: I interesting in this programmer, my question is whether it can b    e used to only correct odometers and few could change via OBDII, how long take to get to Mexico and what the cost of shipping.
A: The odometer correction function is not very good, this tool is professional in read and write ECU. About the different country shipping cost, you can evaluate it by yourself.

Frequently Asked Questions when using Carprog ECU Chip Tuning Tool
Q: Carprog FULL V9.31 is equipped with all Software’s activated?
A: V9.31 Carprog comes with all Software’s activated and all 21 items Adapters, Carprog Full V9.31 can do EEPROM and microcontroller programming.

Q: I’ve an older version (8.21) but some functions are locked and need to connect to the official website for purchase and update.
A: The newest Carprog v9.31 has the same hardware version with V8.21, only upgrade the software to V9.31. and the machine may be locked. If you need newest software V9.31, please read here:
http://blog.uobdii.com/full-carprog-v9-31-software-free-download/

Q: My Carprog is locked what can I do to unlock it?
A: hello, pls tell us your order number? Do you update the main unit or use the others version?

Q: Can Carprog Full Newest Version support Airbag Reset function?
A: Yes, Carprog support Airbag Reset function well, if you want to get more details about Airbag Reset cover models, you can visit here:
http://www.uobdii.com/wholesale/Carprog-Full.html

User Feedback:
  1. Highly recommend this product. I install it on Windows XP. The software is great. It’s very easy to operate.
  2. I have used it to do airbag reset on my Renault, so convenient, I will Recommend it to my friends.
  3. Low cost with powerful function. Car radios, dashboards, immobilizers repair, it’s awesome.
  4. I use Carprog to read Cayenne PIN code quickly, and it needle sweeps and tests a lot of instrument clusters, if you into dash repairs.
Article from  UOBD2 Official Blog Site: http://blog.uobdii.com/newest-version-v9-31-carprog-full-faqs-and-feedback/

Thursday, August 11, 2016

How to speed up Carprog clone reflash / reprogramming


I successfully made a modification to my Carprog clone for fast reprogramming (within 5 minutes), if I need to do it again will not be necessary to open it again and redo all connection every time I want or need to reprogram:

I used the Carprog pins from 15 to 21, those pins are useless for the programmer or any adapter, they are disconnected:


I used a "selector" like the desktop's pc for bios, to select the programming mode, in picture from left to right: 1, 2 3, if the jumper is placed at pins 1 and 2, the pin 55 (reset) from the AT91 is shorted to ground, preventing deprogramming or programming the MCU, if the jumper is placed at pins 2 and 3 the pin 55 is shorted to vcc 3.3v and the Mcu is placed in ERASE MODE. Without jumper the mcu is placed in programming mode:

Now is probably a waste of time, in the near future will save me some time but from now I can reflash the AT91 in less than 5 minutes.

Update: I forgot to mention that I doesn't need to remove the AT88SC eeprom to ERASE/REFLASH the AT91 mcu. After that the Carprog works well. This is MY OWN experience, so, If you want to do the same, do it at YOUR OWN risk.


Ps. Special thanks audiotek for sharing his personal experience of Carprog modification in http://www.digital-kaos.co.uk/forums/

Tuesday, July 26, 2016

CARPROG Lexus immo manual

Here we share Carprog Lexus Immo Manual to you,hope it can help you .And Uobdii.com provide two version carprog v9.31 and carprog full prefect v8.21

Lexus model
Year
Transponder key type
Instruction
ES300
1998-2001
TEX
S4.2.1

2002-2004
TEX
S4.2.2
ES330
2004-
TEX/CR
S4.2.3
GS300
1998-
TEX
S4.2.1
GS300
1998-2000
TEX
S4.2.2
GS400
2001-
TEX
S4.2.1
GX470
2004-
TEX/CR
S4.2.3
IS200
2000-2004
TEX
S4.2.2
IS300
2000-2004
TEX
S4.2.2
LS200
1997-1999
TEX
S4.2.1

1999-
TEX
S4.2.2
LS400
1997-1999
TEX
S4.2.1

1999-
TEX
S4.2.2
LX450
1997-1999
TEX
S4.2.1

1999-
TEX
S4.2.2
LX470
1999-2004
TEX
S4.2.2

2005-
TEX/CR
S4.2.3
RX300
1999-
TEX
S4.2.2
RX330
1999-
TEX/CR
S4.2.3
SC300
1997-1999
TEX
S4.2.1

1999-
TEX
S4.2.2
SC400
1997-1999
TEX
S4.2.1

1999-
TEX
S4.2.2
SC430
2004-
TEX/CR
S4.2.3


S4.2.1 Older Lexus immobiliser system with separated immo box and Texas transponder (4D by Silca). Immobiliser box are located near to ignition key. Usually this is black or brown box marked “immobilizer” or “134.2 kHz”.


Remove immobiliser ECU from the car and open it. Find 93C66 EEPROM in DIP package. Use A5 or A4 adapter and follow CarProg instruction to program transponder key. Short quartz resonator for in-circuit EEPROM programming or remove 93C66 from immobiliser board.


S4.2.2 Lexus immobiliser system with transponder antenna and AMP unit on the ignition key and motor ECU. Used in 1999 – 2003 Lexus cars.


Transponder information is stored in motor ECU. Remove motor ECU from the car, open it and find 93C56 EEPROM marked IC900
Use A6 or A4 adapter and follow CarProg instruction to program transponder key. Short quartz resonator for in-circuit EEPROM programming or remove 93C56 from ECU board.
S4.2.3 New Lexus cars with Texas Crypto transponder (4D by Silca). Transponder key is stored in separated immobiliser unit marked “ECU IMMOBILIZER”. Remove immobiliser ECU from the car, open it and find 93LC66 SMD EEPROM.


Use only original factory key. With Silca 4D transponder car will not start.
Use A6 or A4 adapter and follow CarProg instruction to program transponder key.
Short quartz resonator for in-circuit EEPROM programming or remove 93C66 from immobiliser board.